Newest Diagnostic Software JPRO Commercial Vehicle Diagnostics 2021 v2.2
Type of catalogue: Diagnostic Software
Region: WorldWide
System Requirements
Supported operating systems:
Windows 8 and 8.1 Pro (32 or 64 bit English, 32 bit Spanish)
Windows 10 (32 or 64 bit English, 32 bit Spanish)
Hardware requirements:
1. Minimum: 4GB RAM, 20 GB of available hard drive space, at least an Intel Core i3 processor and minimum of a 1024×768 sized monitor
2. Recommended: 8GB RAM, 20 GB of available hard drive space, Intel Core i5 processor
3. USB port for DLA+ 2.0 adapter or other RP1210C-compliant vehicle adapter
4. Noregon recommends using a Panasonic Toughbook, but JPRO will work on any current PC running Windows 8 or Windows 10
5. Only the Noregon® DLA+ 2.0, DLA+ 2.0 Wireless, Trailer Diagnostic Adapter, DLA+, DLA+ Wireless, and DLA+ PLC adapters are supported.
Note: Ensure your Noregon adapter driver and firmware is up to date
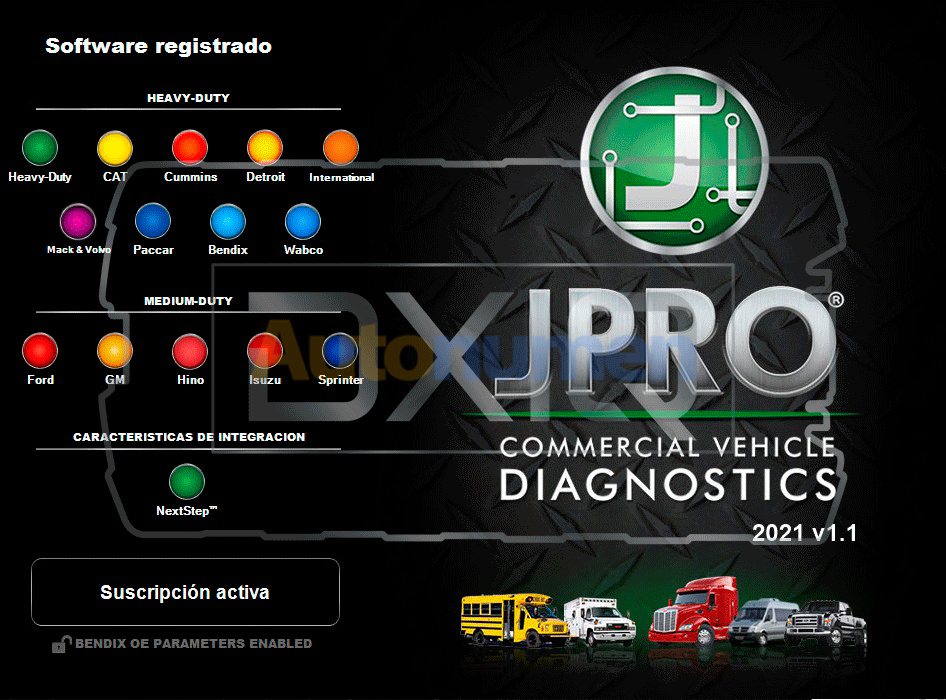
JPRO 2021 v2.2 is the most popular in-shop diagnostics software for heavy & medium-duty vehicles. JPRO has multi-brand coverage.
All JPRO information helps speed up repair times by providing users with detailed service & repair solutions with bi-directional functionality, including DPF regens, cylinder cutouts, parameter changes, and much more.
Activation performed using Teamviewer (included in product price) is required before the JPRO Commercial Vehicle Diagnostics application can be used.
New information in JPRO 2021 V2.2
Make and Models Coverage:
* BODY & CHASSIS
* ENGINES
* TRANSMISSIONS
* ABS
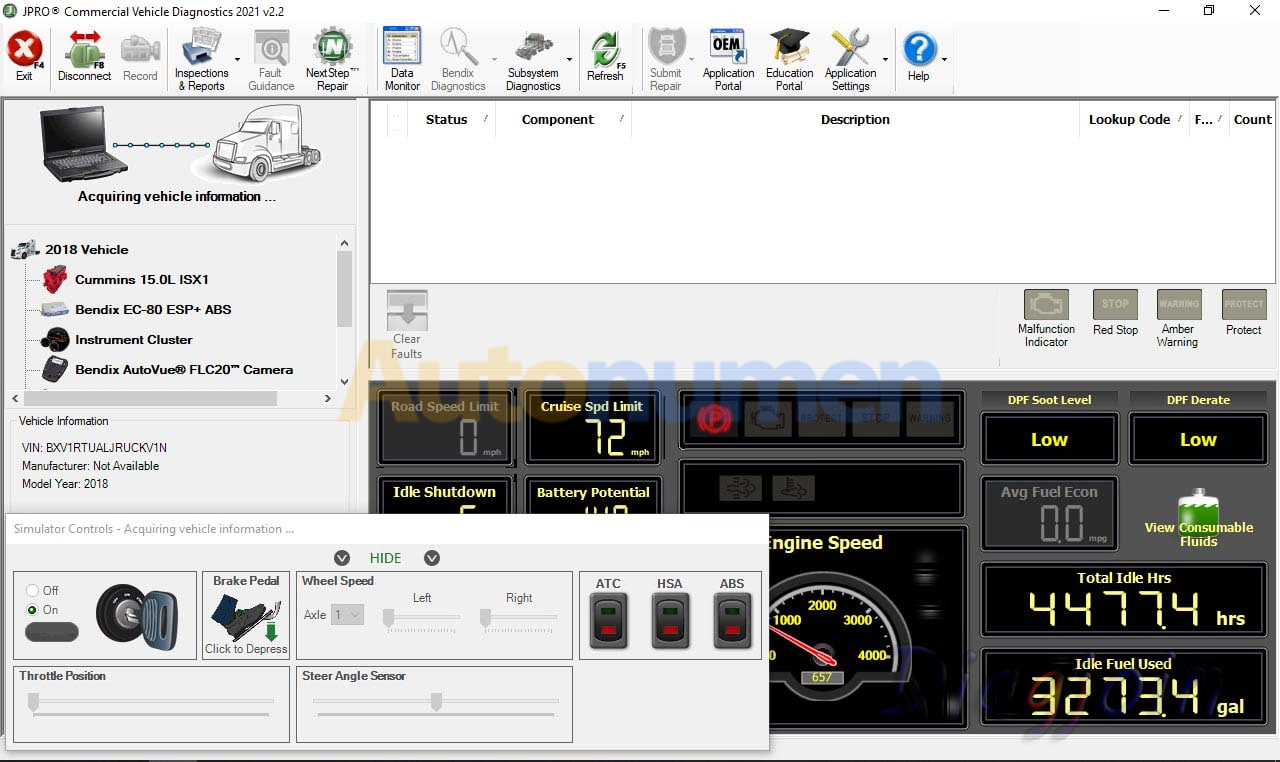
Bi-Directional Controls
Perform parameter changes (Mack & Volvo, Cummins, Detroit Diesel, and International), DPF Regens (Mack, Volvo, Cummins, Detroit Diesel, International, and PACCAR) and bi-directional tests with proprietary data and faults.
OE Level Fault Code Information
Display 99% of heavy-duty and medium-duty fault codes with detailed OEM level component and trailer descriptions
In addition, there is access to the document “What’s New” showing all supported features from the Connection Selection and Help menu. There is access to historical fault data from previous JPRO® connections which can be used to identify intermittent vehicle issues.
Notes:
– For the appropriate vehicle adapter driver must be installed in order to connect to an adapter device. This installation is separate and independent of the JPRO Commercial Vehicle Diagnostics installation.
– Are supported only next adapters:
Noregon DLA+ 2.0
DLA+ 2.0 Wireless
Trailer Diagnostic Adapter
DLA+
DLA+ Wireless
DLA+ PLC
– The Noregon DLA+ 2.0, DLA+ 2.0 Wireless, DLA+, or DLA+ Wireless adapters are required in order to connect to the Ford, GM, Isuzu, or Sprinter Medium-Duty vehicles. Please ensure you have the latest driver and firmware loaded.
– To connect to Ford, use the OBD-II cable for Ford (red).
– To connect to GM, use the OBD-II cable for GM (yellow).
– To connect to Sprinter, use the OBD-II cable for Sprinter (Blue for DLA+ adapter family and Gray for the DLA+ 2.0 adapter family).
– To connect to Hino or Isuzu use the generic OBD-II cable (Blue or Gray).
– The JPRO Off-Highway for Caterpillar only supports the following adapters and cables:
Noregon DLA+ 2.0 or DLA+ 2.0 Wireless Adapter
:: برچسبها:
JPRO,JPRO Professional Diagnostic Tool,JPRO Software,JPRO Professional Heavy Duty Command Bundle,JPRO Professional Diagnostic Toolbox,JPRO Professional,Heavy duty diagnostic tool JPRO,Heavy duty diagnostic tool JPRO, ,
:: بازدید از این مطلب : 165
|
امتیاز مطلب : 0
|
تعداد امتیازدهندگان : 0
|
مجموع امتیاز : 0